The Temple of the Cosmos is a game on KoGaMa created by the user Interextellar.[1] It's game link is this.
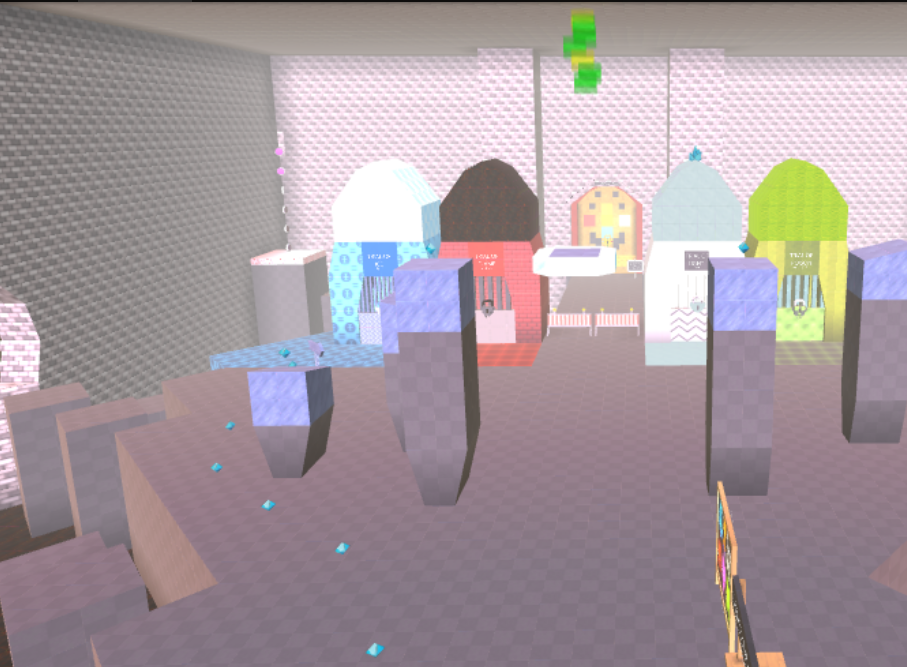
The "Hub World", aka the Temple of the Cosmos.
The objetive of the game is to take on challenges labelled as "Trials", in a linear order. They're unlocked by collecting keys. The game also features playable characters for easier difficulty. However, they're not required to beat the game.
The newest update was a Quality of Life update, optimizing the "skullcrushing" difficulty to be more fair, specially on the later stages.
Gameplay[ | ]
The gameplay consits of many exploration outside the trials, including finding hidden stuff and clues for special puzzles. The "Hub World", known as the same name as the game, has most exploration stuff. There are rooms to explore, these are:
- Quick Access - Used for quickly accessing trials without replaying them if the players has the required game tier.
- Ancient Lottery - Used to bet coins to win something nice (or probably get blown up if too unlucky.)
- Achievements & Monster Museum: Rooms that contain achievements for defeating the 5 major bosses (only that as of currently) and a museum for defeated bosses of all kind. Originally was going to be "Arcade Trials" before being canned and replaced with a extra feature.
- Hidden Boss - This boss can be accessed by looking for clues. It is said a quite-broken stone holds a clue for it.
The rest includes jumping on pillars with ice on the top, which may be challenging for players that don't constantly jump. At the part where the player obtains the Ice Key, there's optional paths that lead to more important stuff, such as the Quality Goods Shop and breakable rocks. Each trial contains 1 major boss, some trials contain 1 midboss battle (with the exception of The Final Trial which has multiple).
Currently, there's 5 trials available to play and several hidden areas.
Trial 1 - Ice Trial[ | ]
The Ice Trial is the first available trial in the game, and considered the easiest. It is accessed easily by obtaining the Ice Key on the short parkour at the HUB.

The Ice Trial.
The trial takes place on a frozen temple, most of the floor covered in ice. The player must go through it by collecting keys and activating the platforms that lead to the Boss Room.
Trial Information[ | ]
Floors: 1
Overall Difficulty: Easy
This trial uses basic puzzles. The disadvantages is sliding on ice and easily falling down if not careful. The ice can be used to accumulate speed, going faster through the trial.
The aprox. time consumed in this trial is around 5 minutes average, though most common players spend 10 minutes or more.

The first boss, fough at the end of the Ice Trial.
Boss Information:[ | ]
- Name: Dripped Eyeball
- Type: Organic?
- Max HP: 16
- Attack Period: 10 (seconds)
- Attacks used: 4
This boss is relatively easy. Shoot the exposed target spots when the boss begins a new attack til the HP reaches 0. It's most deadly attack is the "Flame" attack. It will burn you to a crisp if you're not careful.
Description: "A strange creature created by the ancient god, who resides inside a computer screen. It is the first challenge for the adventurers who want to take on the next challenges of the temple."
Trial 2 - Flame Trial[ | ]
The Flame Trial is the second trial visited in the game. It takes place inside a magma-ridden fortress connected with 2 floors. It is accessed right after beating the first boss battle in the Ice Trial, then adquiring the Flame Key required to enter to this trial.
This one consists of new puzzles and has many hidden treasures. The main puzzle mechanic is using weapons wisely, such as the multi-shuriken's shots and the revolver's speed boosts. This trial's flame theme consists of the player dodging the deadly, scorching flames while using advanced weapon skills.


The flame trial.
Trial Information:[ | ]
- Floors: 2, 2nd floor is two separated rooms.
- Overall Difficulty: Medium.
This trial takes challenges to harder levels, having burning magma everywhere. It utilizes a similar key system to the Ice Trial, but more linear. Weapons are usually used to advance through this trial.
Aprox. time consumed: Arround 10 minutes, average.


Flame Turret Mk. X, the 2nd boss fought.
Boss Information:[ | ]
- Name: Flame Turret Mk. X
- Type: Mechanical
- Max HP: 35 (previously 45)
- Attack period: 8 (seconds)
- Attacks used: 4 (5 if included flame turrets)
This boss can be challenging, as most of it's attacks are very deadly. Recommended to bring friends to fight this powerful turret. It's most deadly attacks include the explosion attack and the "Flame Spread" attack. These can easily kill a player inmediatly if not careful.
This boss is unique as it reveals a vulnerable spot when it attacks, and when said spot is attacked, it opens it's weak spot for seconds which can be damaged. The more friends you bring the more damage you'll deal to the boss (depending). A player along with a friend can deal arround a whopping 10 HP damage to it.
- Tip: Be careful if you're on the middle and the eyes start to glow; it'll use a powerful explosion attack which can one-hit a player.
- Description: "A majestic turret of flame, created by the ancient workers of the ancient god. It is fierce, and will require skills, or even teamwork to put it down to rest. Watch out from the flames!"
Trial 3 - Light Trial[ | ]
The Light Trial is the third trial visited within the temple. It is unique as it takes place in a sky realm, and features much more challenging puzzles. The main element that this trial is themed after consists of making the player guide themselves with the light and avoiding the deadly explosions.


The Light Trial, as it takes on in the sky.
Trial Information:[ | ]
- Floors: 2
- Overall Difficulty: Hard
This trial has difficult timed platforms, deadly explosive hazards and Oculi. Similar to the previous trials, this trial also uses keys as well. It can be considered large. It is heavily recommended to be guided by the map.
- Aprox. time consumed: 15 minutes or more (significantly less if using a speedrun tactic involving bouncing on oculi).
This trial contains 2 bosses.


The strongest turret ever.
Midboss Information:[ | ]
- Name: Ice Turret Mk. 9
- Type: Mechanical
- Max HP: 19
- Attack period: 9 seconds
- Attacks used: 3 (4 if the ice turrets are included)
The "strongest" version of the Turrets. This one will use explosive ice attacks. It's most deadly attacks are the "spreading cold fire" attack, as it causes explosions and can easily kill a player without their consent. Once the boss is defeated, it'll spawn platforms to the key.
- Description: "The Flame Turret's cousin, a way stronger version of the Flame Turret. This one can completely freeze your frog! Watch it buddy! This one also has worse attacks! This turret loves to claim to be the strongest of all turrets."


The Jawdropper.
Boss Information:[ | ]
- Name: The Jawdropper
- Type: Mechanical
- HP: 25 (previously 35)
- Attack period: 8 seconds
- Attacks used: 3 (4 if included the flaming eyes)
This boss attacks on the spots colored after the lights the hands lit up. Guide yourself by the light colors and you'll own this boss, but be careful from it's deadly explosive attacks. This battle is unique as the player uses swords instead of ranged weapons. When both hands are stunned, the Jawdropper drops it's jaw (hence the name), it's pupils begin to spin and it's weak spot can easily be reached due to the jaw drop. It'll return to normal rather shortly after.
It's most deadly attack is the "Orange Light" laser attack. It's fired laser isn't much of a threat, but the explosion spawned on the arena entrance can be a major danger to players, as it'll easily kill anyone near it. This was later modified to a single fire beam to avoid instant killing players as they spawn in the boss battle's arena. While this was nerfed, the cheesing to the boss was removed and instead you have to take down the hands to attack the weak spot.
- Description: "An attempt at recreating the ancient god, just to be a gigantic murderous machine! It will light up the spots it is about to attack on, which was helpful for the ancients to escape from, as there was no way they could do orders from this mech."
Trial 4 - Poison Trial[ | ]
The Poison Trial is the fourth and once was the last trial available before the Final Trial was added. It is extremely difficult and long, as it contains difficult-to-dodge hazards and alot of poison everywhere. While this is a very difficult trial, there are many spots to skip through the floors.
Trial Information:[ | ]
- Floors: 3
- Overall Difficulty: Very Hard
This is one of the longest trials in the game, being aprox. 15 minutes long, or even longer. The puzzles are more difficult than before, and this time there's harder boss battles. Only the most skilled ones can surpass this and finish this trial. Do you have what it takes?
This trial has 2 bosses and 1 miniboss.


The poison virus miniboss.
Miniboss Information:[ | ]
- Name: Poison Virus
- Type: Organic
- Max HP: 8
- Attack Period: ???
- Attacks used: 1
This miniboss is simple. It's only attack is a 3-direction flame attack. It can be dodged, but might be difficult to do so. Note that the flame may do high damage. Target spots are revealed as this boss attacks, however, these spots are random.
Other than being able to poison to the touch and exploding on death, this boss has no deadly attacks.
- Description: "The most toxic and meanest of viruses, even though it has a single attack. Owns a gang of other elemental viruses. He kinda likes Pancake Poiclops, but he's too afraid to tell her."

The Pancake Poiclops, a menacing stacked tower of poison.
Midboss Information:[ | ]
Name: Pancake Poiclops
- Type: Organic
- Max HP: 16
- Attack Period: 7 seconds
- Attacks used: 3
The Pancake Poiclops is the midboss fought at the 1st floor of the Poison Trial. Her attacks are summonning poison spikes, throwing poison blobs which leave poison on the floor for a good while and lastly, a fast spin attack. Most of her attacks are deadly, but usually easily dodged if one is careful. The spin attack is telegraphed by a green eye glow.
- Description: "The worst meal ever. Spits on the floor, summons spikes, tells bad jokes, not even edible. Truly terrifying. She has a soft spot for that Poison Virus, and abides by Malwar's orders."


Lord Malwar XII, as seen in the third and last floor in the Poison Trial.
Boss Information:[ | ]
- Name: Lord Malwar XII
- Type: Organic
- HP: 40 (previously 50)
- Attack Period: 5 seconds
- Attacks used: 5
This boss is very deadly. You have a small arena to move on, and the boss uses explosive attacks. This boss used to have the highest HP of the major, important bosses, before it's Max HP was nerfed down.
Most of it's attacks are very deadly. It is important to use the "Reficul" character to fight this boss due to her being the tank character, albeit this is purely optional. The poison sword swing attack can instantly kill you from the fast movement if you're not careful, which also applies to the explosions. Health packs are found in the arena to heal from poisoning and explosion damage.
- Description: "The king of viruses. He has been created by the ancient god to make adventurers prove their potential. Has a son who wants to be a further king, which makes Malwar proud. He can also blow you up, somehow. His favorite number is "5"."
The Final Trial[ | ]
The Final Trial was added in a major update of the game, and adds 5 brand new bosses, a Monster Museum (think of those enemy encyclopedias you find in RPGs) and a achievement system. This is currently the hardest trial in the game, as well the longest. Players must be prepared to bear the difficulty of the puzzles and fights in this trial.


The virus gang boss
List of Bosses[ | ]
- 1st boss: Virus Gang (20 HP)
- 2nd boss: Ultimate Minaret Warrior X (30 HP)
- 3rd boss: Queen of Love (99 HP)
- 4th boss: Malumcimex (64 HP)
- Final boss: Deu'lementus (85 HP)


The Ultimate Minaret Warrior X. (HP was reduced to 15 in the newest update.)
The Final Trial has currently the most bosses in a single trial on the entire game, with three of the toughest ones.
Strategies:[ | ]
For normal players, it is recommended to bring friends and players on the trial, as it is highly difficult, since it has two of the game's most powerful bosses: Queen of Love and Deu'lementus. Queen of Love has the highest HP out of any boss in the game, taking a while to defeat her, while Deu'lementus is the final boss fought in the game, with a complex attack pattern that'll put off newbies.
For multiplayer, two, three or four players should be enough to be able to beat the final trial with proper teamwork. While the second floor after the first two bosses is highly difficult and can separate you from your friends, it is possible to use skips on that floor with the strenght of the Lightning Speed powerups.


The Queen of Love.
On the first bosses, each player can target different viruses on the first boss, which should not be a problem and can make the fight shorter. For the 2nd boss, be careful of the attacks, as it can easily kill your allies. Staying in the middle prevents most damage, but will be harder to damage the boss. Staying on the sides can leave you to risk of death, but you'll be able to attack the boss' weakspot. If you get too close to the turret, you'll be frozen, won't be able to jump at all and you'll take constant damage, which leaves you weak to death. Stay away from the turret. Once it is defeated, prepare to go into one of the hardest scenarios in the game.
Floor 2 - Scarlet Festival is a very hard zone, as it has very fast-paced parkours, but it is easy to super hop around the platforms, which allows you to skip through segments. A good strategy is to abuse the bounce of the Oculi, which will let you bounce far, at the high risk of taking "fall" damage, or being injured significantly while doing so. A less dangerous but less effective strategy is to use the rotating flame traps, as they are solid, to reach further areas. There are no checkpoints on this floor aside from the first one, so it is heavily implied to be careful on this stage.


Malumcimex, the 4th boss.
After beating the bloodstained nightmarish floor, you'll find yourself into a greater threat: The Queen of Love. This goddess can defeat your allies pretty quickly, along with her Oculi, so be very careful fighting her. You can set your allies into getting rid of Oculi, while you and another ally attack the Queen, which can be effective, as multiple players can easily drain the HP pool of the superboss, making things shorter than it would be fighting her alone. Defeating her will yield a incredible crystal reward, which is useful to gain higher game tiers to fast-access levels, unlock the slot machine, and other reasons. While it is possible to skip this boss under a Game Coin payment, it isn't recommended to do so as it is highly expensive, costing 8500 game coins. Once she is defeated you'll move into the last floors of the Final Trial, close to outer space.
You should have entered the last floors, along with your allies, ready for the final challenges now. This room contains tough platforming and a large chamber containing four difficult separate puzzles. It is recommended to do each puzzle separately by each ally, as it can make things easier. The trickiest ones are the Flame and Poison puzzles, as they are highly difficult. Once the other puzzles (not including Flame) are finished, it is recommended to bring all your allies into beating the Flame puzzle, as multiple players can easily hit the targets in the puzzle.


Deu'lementus, the final boss of the game.
Once you've collected the final keys to fight the boss, get ready for another challenge. Malumcimex is the strongest of viruses, even stronger than his own father. He can use all of the elements thanks to the help of the Virus Gang, and will not hold back against you and your party. The only optimal strategy is to bring 1 friend in the battle, and then let the other 2 friends to appear in when you've fallen down, which allows for faster damage without constant respawning. Once you defeat this thing, you'll face into one extra puzzle before the final boss of the game, so prepare yourself!
And you've done it. You and your allies have passed the hardest of challenges and made it onto the last challenge. Use everything you've learned against the ancient god, as it is strong enough to be able to wipe out your allies. Deu'lementus has a large arsenal of elemental attacks. Be highly careful of the poison attack, as it targets the whole arena, so keep an eye for his attacks and his poison attack charge meter, make sure to hit the exposed targets on the pillars to summon a platform to avoid it. Defeating him will not instantly yield victory, as he has one final attack up his sleeves. Dodge the death bullet barrage, and make sure you survive or you'll have to rewatch the cutscene before the boss battle. Once defeated you'll reach the bonus room and beat the game.
Extra Trials[ | ]
The extra trials were going to be added before being postponed indefinitely. They would work as endgame challenges for players, but only accessible if players have Tier 3 available, and must have the Final Trial beaten in the server atleast once. They're the only trials not located alongside the others inside the temple.


The two trials, located at near the top of the temple.
Dark Dungeon of Living Flesh[ | ]
Intended to be the first accessed extra trial. It was planned to feature 3 minibosses and 1 boss, while being longer than other trials.
Palace of an Obscure Ending[ | ]
Intended to be the second accessed extra trial. This was also intended to be the largest trial in the game, but due to limitations it was scrapped. There's no exact plans for a specific amount of minibosses but it was said that "it might feature a Fallen Angel boss battle", but this idea was later repurposed for a real game the creator is working on. It was planned to reveal an ending for the game, but this was simply replaced by the short ending after the final boss.
Extra Areas[ | ]
These areas are not referred as trials, and can only be accessed by certain means.
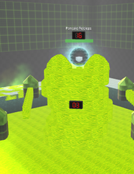
Scarlet Badlands[ | ]
A extra area added in the Overhaul Update, it was never finished. Not much information has been given aside from being another inspiration. Considered as the "6th area accessed".
This large area can be accessed after anyone beats the Poison Trial (and is permanently unlocked for that server), and intended to be the last challenge before the Final Trial is added. However, it no longer is so, as the Final Trial was already added. The area resembles a barren wasteland with poison lakes, underground laboratories, high-security doors and many dead trees with crows. This area is always available as long someone beats the Poison Trial in a server, which means it can be accessed early by players. Since the area is not finished, it has been marked with pink-black blocks on specific spots.
Pagoda's Sign Boss[ | ]
The once-locked Pagoda was made enterable after the game reached 10k plays. Once the final trial is completetly beaten, it will be available with the door opened.

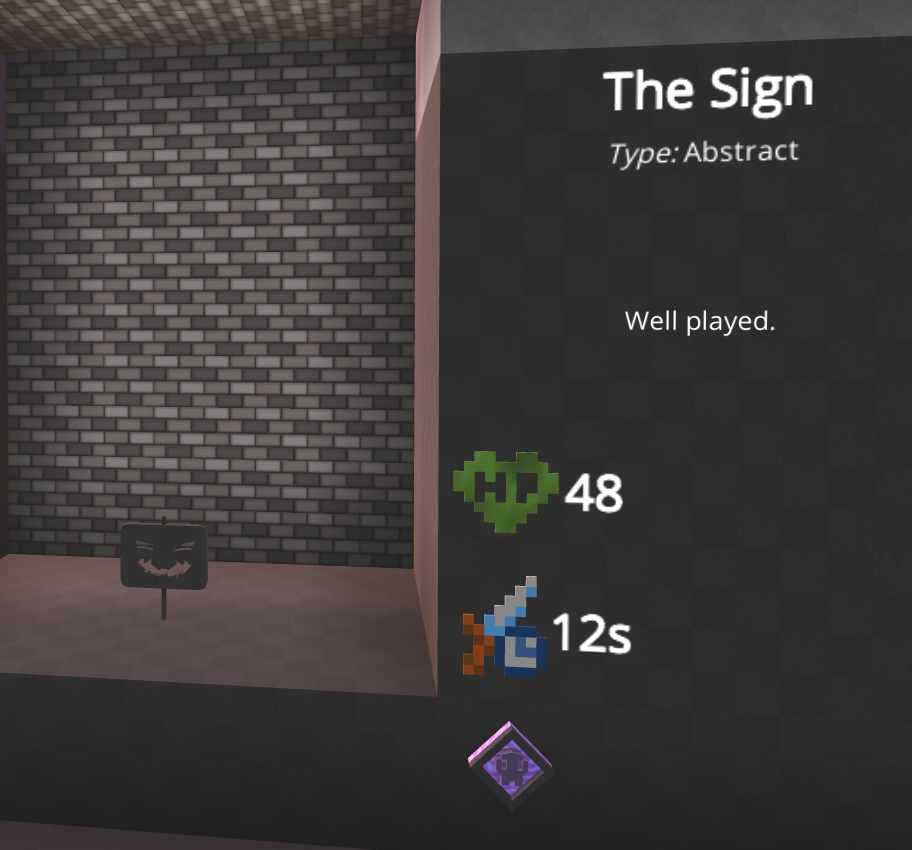
The Sign, the final challenge of the game. (Boss' HP was buffed.)
This houses the game's hardest optional boss, which uses the Death Element (Kill block), a variety of bullet hell attacks, and serves as the ultimate challenge of the game.
Despite this, it's the boss with the lowest HP of any post-poison trial boss, formerly slightly lower than Malwar's, but now it surpasses his max HP by 8. This boss is also the only boss with a checkpoint close to the arena, which allows for quicker respawning.
Boss Information:[ | ]
- Name: Old King, The Sign
- Type: Abstract
- HP: 48
- Attack Period: 12 seconds
- Attacks used: ???
Other Features[ | ]
Ancient Lottery[ | ]
The Ancient Lottery is a room available once the player reaches Tier 2. It allows using a slot machine for betting coins for more coins or many crystals. The current available combos are:
- Triple Diamond - This combination grants 500 crystals. In theory it can be easily obtained by the first player who spins the slot machine.
- Triple Heart - This combination grants 15000 coins. It is a great reward to buy weapons on the Quality Goods shop, along other purchases.
- Triple Skull - A bad combination that causes explosions arround the area with the slot machine. Be careful, as this can easily kill players instantly.
Any combination that isn't one of these will not yield any reward. The player will have to spin again.
- It is advised to read the "DO NOT" message on the slot machine, as the player will waste coins if they mash their E key too fast while standing on the pressure plate, which means the player will have to be patient and jump before spinning again, while waiting for the slot symbols to dissapear.
Once the player gets all rewards, the Ancient Lottery won't yield more rewards. It is not advised to respin as it'll be a waste of money (unless one wants to help their friends).
Trivia[ | ]
- The "Dripped Eyeball" boss references Earthbound (A well-known RPG game developed by Nintendo) and Terraria (A sandbox RPG game developed by Re-Logic). The pixel art of the boss heavily resembles the Demon Eye enemy from Terraria, while also referencing the enemy battle sprites of Earthbound. It's also a reference to the popular "drip" meme.
- The turret bosses are heavily inspired by the Final Turret IX bosses from Crosscode, a action RPG videogame developed by Radical Fish Games.
- The Ice Turret Mk. 9's usage of the number 9 and being considered the "strongest turret" is a reference to the ice fairy Cirno from the video game series Touhou Project, said fairy usually refers herself as "the strongest", and often associated with the number 9 by the Touhou community.
- The Scarlet Badlands is heavily inspired by Crosscode's Vermillion Wasteland, as confirmed by Interextellar.
- The game is entirely heavily inspired by Crosscode, as most trials are designed after the dungeons found in the game, along with inspiration from boss battles and other gameplay features.
- Several Final Trial bosses are inspirations: 1. Ultimate Minaret Warrior X was gonna appear multiple times as a reference to Final Turret IX's multiple appearances in Vermillion Tower, but this was scrapped in favor of different bosses and not having to remake the same boss over and over. 2. The Virus Gang boss is inspired after the virus enemies from Crosscode. 3. Queen of Love is inspired by PERFECTHEART from OMORI, which is also a superboss. 4. Malumcimex also is inspired from the virus enemies from Crosscode, but takes form as a more advanced virus. 5. Deu'lementus draws heavy inspiration from Di'orbis, as both have very similar appearances and relations. A major difference is that Deu'lementus is the only "ancient god".
- The attack pattern from The Sign (and Deu'lementus' final attack) is a heavy inspiration from Touhou's stage boss spellcards, mainly survival ones.
- A playable character in the game (which uses Sakuya as the avatar) is inspired from Touhou Luna Nights, where sakuya has similar movement mechanics (Gliding, double jumping, which is not included, etc.)
- The Sign's attacks are also inspired by Mustache Girl's Time Piece attacks from A Hat In Time.
- This game is very long for a KoGaMa game, having various hours of gameplay (potentially more as well).